

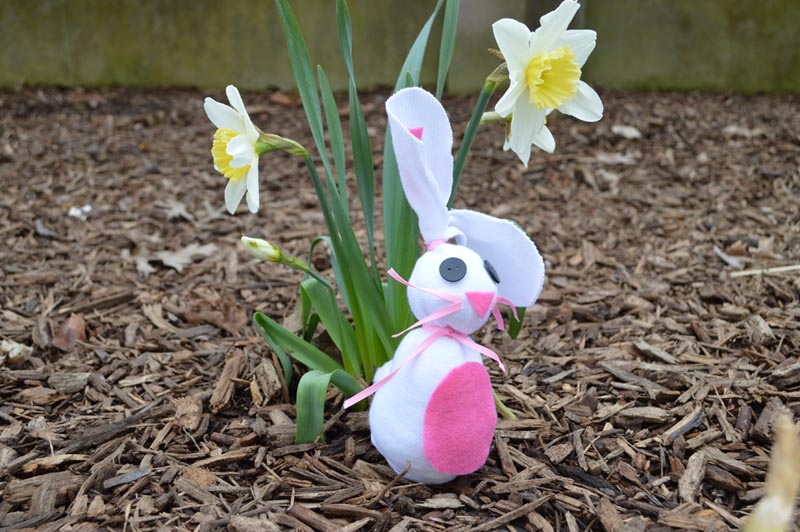
Spring has finally sprung, which means warmer weather, blooming flowers and lots of inspiration for fun art projects. Whether you’re celebrating the Easter holiday or just excited about the spring season, this sock bunny art project is a great way to spend an afternoon.
These bunnies are perfect to give as a gift, to decorate your home, or to keep as a cute new friend. Step-by-step instructions are below, but don’t be afraid to get creative and make it your own!
These bunnies are perfect to give as a gift, to decorate your home, or to keep as a cute new friend. Step-by-step instructions are below, but don’t be afraid to get creative and make it your own!
Supplies
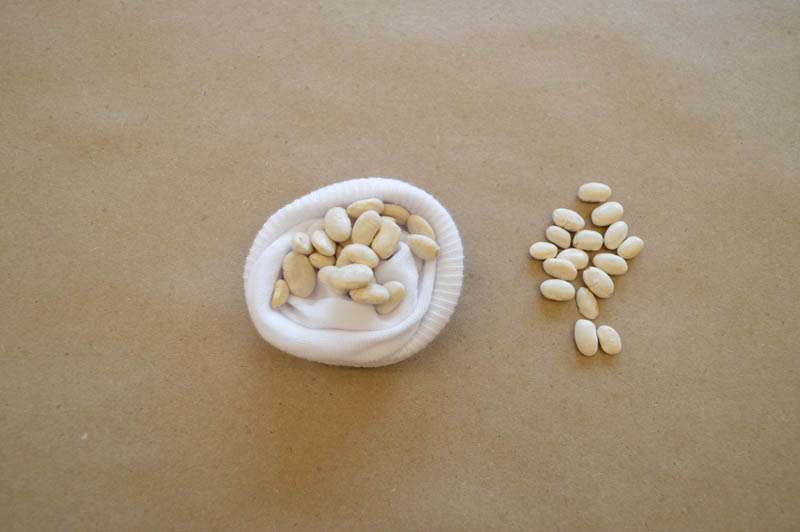
Step 1
Scoop about 2 tablespoons of beans into the bottom of the sock to weigh it down.
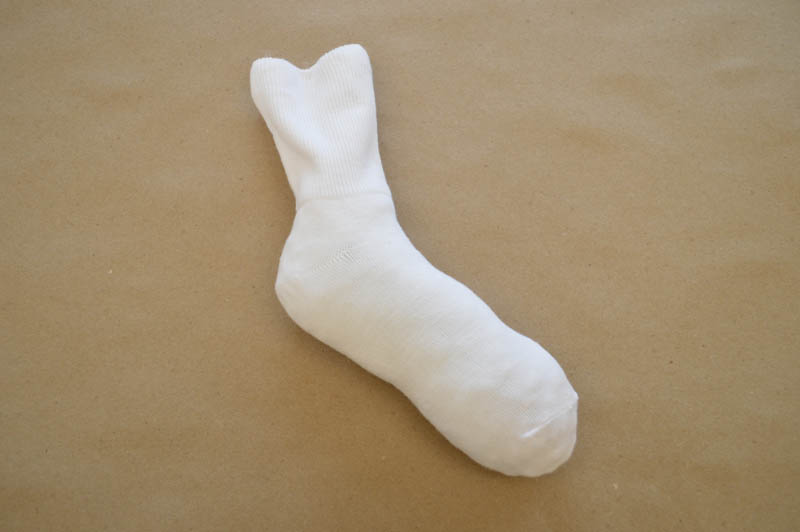
Step 2
Fill the sock with stuffing to the bottom part of the ankle. On most socks there are vertical lines on the ankle, which are a good indicator of where to stop the stuffing.
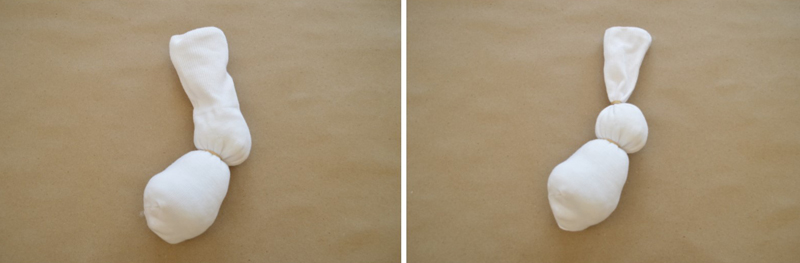
Step 3
To create the bunny’s body, place the first rubber band where the arch of the sock and the heel meet. Wrap the second rubber band at the bottom of the ankle to create the bunny’s head.

Step 4
Cut a straight line from the very top of the sock (where there’s no stuffing) to the first rubber band, and be careful not to snip the rubber band. This will split the top into two bunny ears. If you’d like, you can trim the tops of the ears into a rounded shape.
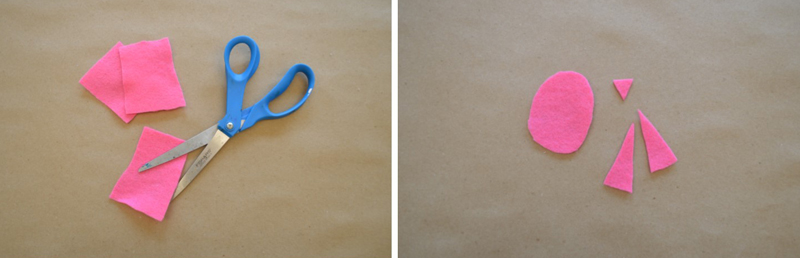
Step 5
Cut the colored felt into whatever shape you want the tummy to be, plus a small rectangle for the nose, and one or two large triangles for the ears.
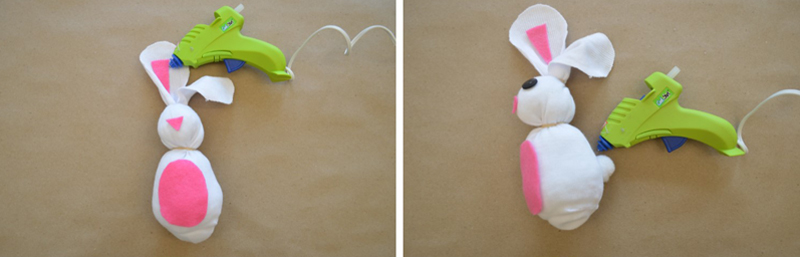
Step 6
Attach the felt pieces (tummy, nose, and ears) with glue. If you want one of the ears to be floppy, leave one of the ears without a felt piece. Also attach the buttons for eyes (or googly eyes) and the puff ball tail with glue.

Step 7
Wrap one piece of ribbon around the bunny’s neck to cover the rubber band, winding it around twice before tying it in a bow.

Step 8
Wrap the second ribbon around the rubber band at the top of the bunny’s head three times, then tie it into a double knot and cut off the extra ribbon.
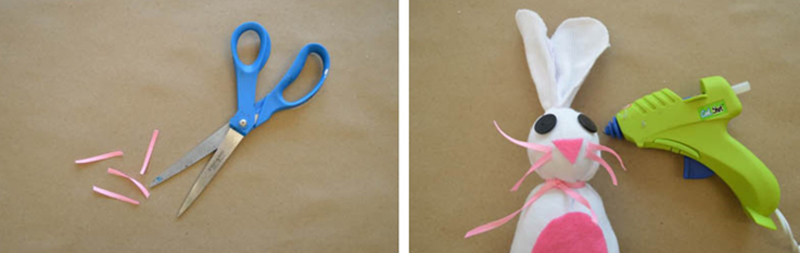
Step 9
Cut the ribbon you just trimmed into four 1-inch pieces. Attach the pieces as whiskers.
Share your bunnies with us! Post on Instagram and tag the Frick @frickpgh
- Small sock
- Dry beans
- Stuffing
- 2 rubber bands
- Felt
- Ribbon
- Puff ball
- 2 buttons or googly eyes
- Scissors
- Hot glue gun or strong fabric glue
Step 1
Scoop about 2 tablespoons of beans into the bottom of the sock to weigh it down.
Step 2
Fill the sock with stuffing to the bottom part of the ankle. On most socks there are vertical lines on the ankle, which are a good indicator of where to stop the stuffing.
Step 3
To create the bunny’s body, place the first rubber band where the arch of the sock and the heel meet. Wrap the second rubber band at the bottom of the ankle to create the bunny’s head.
Step 4
Cut a straight line from the very top of the sock (where there’s no stuffing) to the first rubber band, and be careful not to snip the rubber band. This will split the top into two bunny ears. If you’d like, you can trim the tops of the ears into a rounded shape.
Step 5
Cut the colored felt into whatever shape you want the tummy to be, plus a small rectangle for the nose, and one or two large triangles for the ears.
Step 6
Attach the felt pieces (tummy, nose, and ears) with glue. If you want one of the ears to be floppy, leave one of the ears without a felt piece. Also attach the buttons for eyes (or googly eyes) and the puff ball tail with glue.
Step 7
Wrap one piece of ribbon around the bunny’s neck to cover the rubber band, winding it around twice before tying it in a bow.
Step 8
Wrap the second ribbon around the rubber band at the top of the bunny’s head three times, then tie it into a double knot and cut off the extra ribbon.
Step 9
Cut the ribbon you just trimmed into four 1-inch pieces. Attach the pieces as whiskers.
Share your bunnies with us! Post on Instagram and tag the Frick @frickpgh